Step by Step Guide for Small Business Owners to Cheaply and Effectively Build a Website
If you are a small business owner with a brick and mortar store, chances are that you have already been approached by web design agencies in your neighborhood soliciting your interest in them building a website for you. Whether or not you have accepted the offer, the bottom line is that it is 2015 and every business needs to have an online presence. The benefits of owning a website far outweigh the cost and investment required to build and manage an online presence.

But what if you cannot afford to spend hundreds, if not thousands of dollars that the web design companies charge? There are always free or cheaper alternatives available. In this tutorial, we will take you through the step by step instructions that one should follow to build and manage their own website. What’s more – the annual costs should not be more than the cost of a couple of meals. So let us get started:
Step 1
The first step is to pick a name for your website online. You can of course choose to be cheap and go for a free domain name on services like Blogger or WordPress.com. But this is strictly not recommended for businesses – if you cannot spare a few dollars a year for a domain name, you really cannot expect potential new customers to trust your offerings either.
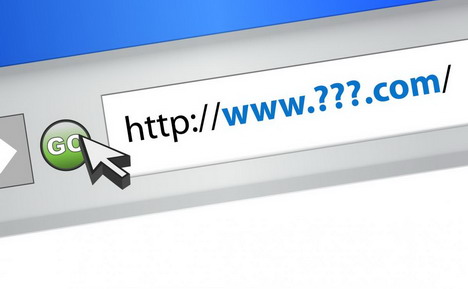
Ideally, pick a .com address that replicates what you have on your name board. If you own Smith’s Auto Garage in Rochester NY, then this is the order of preference for the ideal domain name:
- smithsautogarage.com
- smithsautogaragerochester.com
- smiths-auto-garage.com
- smiths-auto-garage-rochester.com
and so on.
Step 2
Once you have identified the potential domain names for your website, the next step is to check the availability for one of them online. Given that there are more than a billion websites on the internet today, there is a huge demand for quality URLs. The typical way to go about checking for domain name availability is to go to a popular domain name registrars like NameCheap. But several registrars are known to hoard domain names and sell it to customers at a premium. A safer way to do it is to go to websites that provide WhoIs information for domain names and check for the domain name availability here. If your favorite domain name is available, go ahead and buy it from one of the leading domain registrars. It does not cost more than $10 a year in most places.
Step 3
So now you have a domain name. The next step is to go ahead and design your website. There are two popular ways to do it. You can either host your website on a content management system like WordPress.org, or design a pure-play HTML script. Both alternatives have free and paid options.

In the case of pure-play HTML, you can pick a popular website builder like IM Creator, or buy HTML designs from a ready-to-use templates service like ThemeForest. If you choose WordPress, you can easily search Google for “WordPress themes” relating to your industry and this should give you a good list of themes to pick from. Using the same example above, for an auto garage shop, you could search for ‘free automobile repair WordPress theme’ – you may either pick a free theme, or pay for a premium-use theme.
Step 4
The next step is to buy a hosting space. You can either choose to go with a free hosting service, or pay for one. There are literally thousands of shared web hosting plans available at extremely low prices. If you are a small business operating in limited geography, it is recommended that you find a web host that has a server in your geography. This way you can make sure that your website loads fast for your visitors.
Step 5
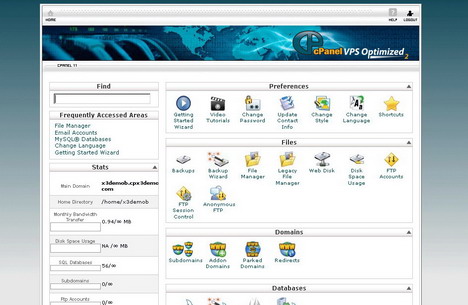
You have now purchased your own hosting space. Most shared hosting plans come with cPanel installed. cPanel is a service that lets you to add files and manage your website through an easy-to-use interface. If you have purchased a WordPress theme, make use of the Fantastico or QuickInstall features on your cPanel to install WordPress. You will be asked to enter your domain name as part of the installation process. Follow the steps and you will have your website with placeholder information ready. Make a note of the admin login and password you enter.
Step 6
Assuming you have WordPress installed, visit /wp-admin and login with your login credentials. Once here, navigate to Appearance > Themes and click on ‘Add New’. Upload the WordPress theme that you have purchased or downloaded. Alternately, you can also search and install a theme using the ‘Search themes’ option. If you have decided to not go with WordPress, login to /cpanel and navigate to the public_html folder and upload your website files here. This procedure requires the understanding of HTML codes and is outside the scope of this topic.
Step 7
Do you have a logo ready for your business? If you have one for your brick and mortar store already, you can get a replica of that done digitally through services like Fiverr.com where it doesn’t cost more than a few dollars. Alternately, you may use a similar service to build a new logo. Always remember that you get what you pay for.
Step 8
You now have a successfully installed WordPress website. The next step is to customize the theme. Some WordPress themes come with their own back-end options to easily change various features like logo, add visitor tracking scripts, etc. Use the ‘Read Me’ file that may come with your theme to see if you have these features available. If not, navigate to Appearance > Editor to tweak the HTML code. This step requires knowledge of HTML.
Step 9
In the WordPress back-end, there are options to set the title for your website, the URL structure, etc. These are important from a search engine point of view. Navigate to Settings and click through the various options like General, Permalink, etc. to enter the various details requested.
Step 10
You are almost through. What remains is adding actual content to your website. Depending on your theme, this process varies. So it is a good idea to check your theme’s ‘read me’ file. In the absence of one, go to the Pages option on your wp-admin section and add new pages for the homepage, About Us, Contact Us, etc.
Step 11
This completes the website setup. It is recommended that you install a search engine optimization plugin like Yoast to help you optimize the site further. To do this, go to Plugins > Add New and use the search feature to search, install and activate the plugin.
This completes the process. Got questions? Post them in the comments below and I will try to help you out.

You May Also Like:
 How to Add SSL / HTTPS to WordPress Site – Complete Guide
 10 Things Successful Business / Commercial Website Must Have
 Step-by-Step Guide for Improving Your Writing Skills
 Best Guide on How to Increase Website Traffic or Blog Traffic
 How to Create a HTML Sitemap for Website or WordPress Blog
 How to Create a Google Custom Search Engine
 30 Best Drag and Drop / WYSIWYG Website Builders
 How to Create Favicon for Website & WordPress Blog
Tags: business, tutorial, web design resources, web development resources, website building, wordpress resources