Professional Tips for Taking Awesome Photos with a Smartphone
“The best camera to have is the one that’s with you all the time,” goes the saying. And judging from statistical data compiled by the TomiAhonen Phone Book 2014, the type of digital camera used by most people at present happens to be attached to a smartphone. Smartphones have replaced the standalone camera as the mass-market camera type of choice this past decade.
In 2014, over 1.7 billion smartphone units were sold, comprising 95% of the digital camera market. Standalone cameras had just 5% of the market share at 95 million units sold in the same year.
The paradigm has been shifted so sharply that even the established standalone camera manufacturers took knee-jerk measures to capitalize on the camera phone’s popularity by coming up with a slew of lenses, apps, mounts, printers, and flashes designed specifically for use with smartphone cameras. These accessories are very popular online, with retailers such as Adorama offering them for smartphone photography enthusiasts.
And while most smartphone cameras (iPhone or Android) don’t have the speed, large sensors, or zoom capabilities of their standalone camera counterparts, there are dozens of ways to hack these shortcomings to come up with gorgeous photographs worth publishing. No one has proven that it can be done better than award-winning photographer Sephi Bergerson, who famously photographed and edited an entire three-day Indian wedding using only an iPhone 6s Plus.

You don’t have to be an experienced, award-winning professional photographer to get the most out of your smartphone’s built-in camera. With a steady hand, some composition knowhow, the right settings, and a good eye (plus a little luck!) for lighting, you, too, can take pictures that can reasonably pass for standalone camera quality—or even better! Here are some tips to help you get on the right track:
Know Your Smartphone Camera in and out
Compile a checklist of your built-in camera’s features and specifications and rate them according to their strengths and limitations compared to a standard compact camera. That way, you’ll know right off the bat what you’re working with. Test out its various modes (e.g., panorama, video, etc.) in different conditions (e.g., indoors, low light, direct sunlight, moving subject) to find out where the different modes excel and where they are lacking. Meanwhile, here are a few features to look out for that, when used, will significantly improve the quality of your shots:
- High Dynamic Range (HDR) mode
- Gridline feature
- Bigger image sensor (at least 1/3 inch)
- Large aperture (at least f/2.2)
- Exposure adjustments
- App compatibility
Try working with what you’ve got first, master them with a bit of practice, and then enhance the experience with the numerous third-party camera apps and accessories that are designed specifically to work around your smartphone’s limitations.
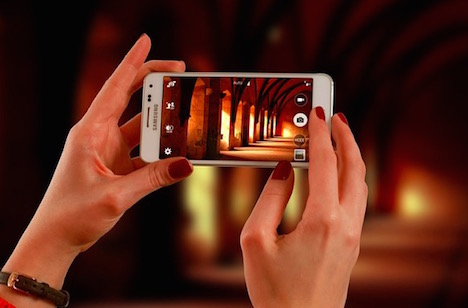
Use Two Hands for Stability
Due to the camera shutter usually being located on one side of the phone’s touchscreen, many people tend to shoot photos with just one hand. Doing that is just asking for jerky, blurred pictures. For optimum stability, National Geographic photographer Cotton Coulson advises holding the phone with the left hand and releasing the shutter with the right thumb (for the iPhone, the shutter isn’t released until the thumb is off the shutter button).
Avoid Using Digital Zoom
Camera phones were never designed to compete with DSLRs when it comes to zoom or action photography. For professional-quality photographs on a smartphone, shoot with the lens at its widest angle of view. Barring an external optical lens attachment, digital zoom is good for reference purposes only. The greater the zoom, the more likely the camera will shake and lose sharpness. Leaving the zoom as is and focusing on filling the frame with a backdrop that illustrates what you’re trying to get across is much better for composition and picture quality.
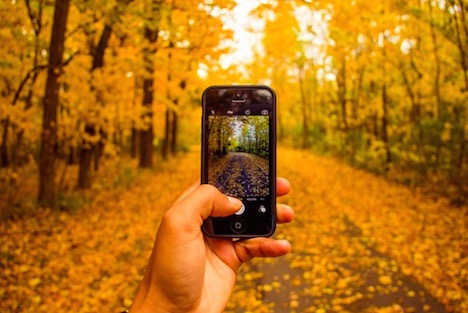
Keep Compositions Basic
When you compose a shot, you’re arranging the visual elements in your view—lines, shapes, colors, space, light—and framing them into a complete image that tells a story to the viewer. The resulting arrangement is called composition. Here are a few elements that help transform a photograph from static and dull to three-dimensional and dynamic:
a) The Rule of Thirds
Don’t put your subject dead center. Divide your image into a square grid made up of nine equal parts and place the subject along the lines where they intersect to create depth, dimension, and various other points of interest.
b) Lines
Whether they create or break a pattern, a viewer’s eyes will be naturally drawn to lines (i.e., straight, curved, diagonal, or even implied), following them to the end and pulling the whole image into one cohesive unit.
c) Space
When you surround your subject with negative or empty space—such as the sky or any wide expanse that is not dissected with lines—it simplifies your frame. This means less distractions and more focus so that the subject really pops.
d) Frames
Like space, frames help create more focus and visual interest in your subject. Just about anything can be used as a frame as long as the subject is positioned aesthetically within and the frame is in proper view.
e) Color
A splash of color—especially a strikingly contrasting one—creates mood, vibrancy, and also focuses the viewer’s attention. Just make sure the color complements the image by sharing elements with it (e.g., same texture, similar size, etc.) rather than distracting from it by being radically different.
f) Symmetry
Somewhat of a contrast to the rule of thirds, symmetry is a photography trick that works well especially when used with reflective surfaces. Though the subject is centered, the resulting image is divided equally into reflected and non-reflected halves, thus creating drama and contrast.
Light is Everything
Photographers all agree that light is the defining factor that separates camera phones from standalone cameras when it comes to quality photographs. This is because smartphone cameras feature tiny sensors compared to DSLRs, capturing less light and detail. To shoot decent pictures on a smartphone, therefore, you need good light sources or apps to adjust shutter speed. Here are a few techniques to feed more light into your shots:
a) Shoot in the Morning or Late Afternoon
Harsh sunlight during the middle of the day washes out images and tends to make human subjects squint. The softer light of mornings and late afternoons captures a wide variety of color gradients and avoids losing details.
b) Adjust Exposure Setting
Increase or decrease your camera phone’s exposure settings to control the light filtering into the sensor.
c) In the Absence of Light, Use HDR
iPhones, Android, and Blackberry 10 smartphones feature an HDR (high dynamic range) mode that take three shots at three different exposure settings, then combine them to get the best level of detail in each area of the shot. Avoid using the LED flash as much as possible, since they tend to be located very close to the camera’s lens and can leave ugly glare effects and noise on photos.
d) Take Silhouette Photos
If you can’t work with the available light, consider working against it and create a silhouette effect on your photos. They are particularly ideal for landscapes and mood shots.
e) Play Around with Reflections and Shadows
The play of light and shadows (also called chiaroscuro) on photos, especially in low sunlight, can sometimes be more interesting than the actual subject. Reflection capture, meanwhile, is one of the more dramatic techniques in photography due to the myriad of resulting unique effects. The joy in reflection photography is partly in the discovery of things that can create reflections such as water, mirrors, glass, windows, metal, and just about anything with a reflective surface.

Experiment with Shooting Angles
Who says you should always take photos from chest-level? If you learn to raise, lower, or skew your angle of perspective when photographing a subject, you may discover whole new viewpoints to explore! Below are some angles to consider:
a) Low Angle – allows your subject to stand out better against an empty space, all while blocking out unwanted or extraneous elements coming from the sides of the image.
b) Diagonal Alignment – creates balance and harmony in composition, especially between two subjects, because it frames them in almost equal proportion despite one being in the foreground and the other being in the back.
c) Subject-Level Angle – ideal when shooting children and animals in close-up, as they tend to disappear in the background or are captured in a less intimate bird’s-eye-view when photographed from the height of a standing adult. Kneel, crouch, or even lie down to get down to a child’s or pet’s height, and don’t be afraid to get close.
Use Inexpensive, Everyday Items as Photo Hacks
You can use your smartphone to passably fake studio photography shots that are usually taken with expensive DSLR cameras, fancy lights, and lots of editing. How? Just have an ample, natural source of light and purchase a few apps, office supplies, textiles, lamps, and other inexpensive, everyday items to recreate the effects that the pricier equipment do just a bit more conveniently. Some items to consider for your makeshift studio include:
- Black foam core (to lock in exposure, then edit out later)
- White foam core (for background and light reflection)
- Picture frames (for real time framing)
- LED panel (as an additional light source)
- LED flashlight (for face illumination)
- Shimmery textiles (for background texture and reflective effects)
- Electric fan (for wind-blown effects)
Edit with Apps
Let’s face it, no one will claim that a photograph taken by a smartphone is going to be of higher quality than one taken by a DSLR or even an upper-range compact camera. In this case, the use of post-processing camera apps is pretty much a given. And while you’ll likely get the best results editing your photos using much more powerful (and expensive) professional editing software on your computer; many downloadable camera apps allow you to make decent adjustments on your images at no cost or for just a few bucks. Popular editing apps include VSCO Cam, Instagram, Snapseed, Facetune, and PhotoDirector.
Since they say that the best camera is the one that we have with us all the time, it’s probably not inconceivable to consider that each of the over 1.91 billion smartphone owners worldwide has the best camera in their hands right now. And with good lighting, some decent photography skills, and a downloadable camera app or two, you probably have the potential to be a more-than-capable amateur photographer as well to give a professional like Sephi Bergerson some competition. So start downloading, keep clicking, and post away!

You May Also Like:
 17 Tips to Improve Your Smartphone Photography
 Top 25 Gadgets that Help Smartphones Take Awesome Photos
 Top 10 Smartphone Tricks to Take Amazing 360-degree Photos
 Say Cheese! The Five Smartphones with the Best Camera Features and Apps
 Best 15 Time Lapse Apps for Smartphone
 15 Tricks to Make Your Home Videos Look Professional
 20 Google Photos Tips and Tricks You Must Learn
 6 Reasons Why Photography Remains a Great Career Choice
Tags: camera, mobile app, photography, smartphone, tips & tricks