15 Cool Apple Music Tips You Should Know
Are you one of those individuals who have signed up for three-month subscription of Apple Music trial, but are you really taking advantage of what it has to offer? Before you actually make up your mind whether to leave or to keep up the subscription to the brand new service launched by Apple, make yourself familiar with the following tips:
1. Deciding whether to follow or unfollow
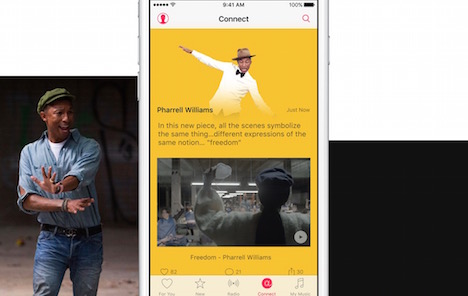
If you have populated connect page with the artists you have decided to follow then you can start unfollowing them. It is pretty simple, all you gotta do is to tap the “follow” button on the artist page you are interested in. Now you need to tap avatar of your account and tap “Following” in order to unfollow the desired singer or a band. Make sure that you have disabled the particular feature that follows anyone on its own whenever someone is added to your music library.
2. More on connect feature
If you look closely into the settings, choose “General and Restrictions”, you have to push off the Connect feature. This will remove the “connect” button from the navigation bar of the apps. If you are using iPad, the icons come together after getting shuffled in order to fill the space.
3. Offline listening
If you are traveling to some place or boarding an airplane, it will be a good idea to download some of your favorite music for offline listening. This is related to the songs that are there in Apple Music cloud – syncing local tracks to the Apple devices using iTunes or iTunes Match like you used to do. There is a “More” menu that can be found next to the playlist, track or an album and then you have to make a choice for “Make Available Offline”.
4. Downloading music using mobile data
Majority of the users prefer downloading their favorite songs over a WiFi network, but if you are in a hurry of queuing up your playlist and along with having the data plan to cope, you enjoy the liberty of downloading songs on your cell network connection. All that is required to keep a check on your data plan usage.
5. Streaming song as an alarm
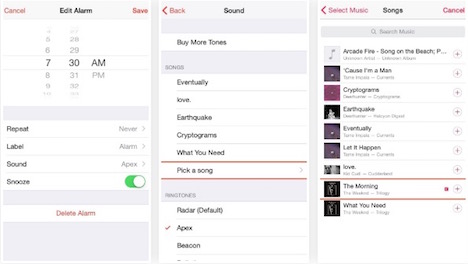
Majority of the owners use their iPhones as alarm clocks, but Apple Music has added a fun element to it. Your first step would be to add songs, to “My Music”, that you want to be used as an alarm. Now, you have to open “Clock” and then “Alarm”, it’s your wish either to add a new alarm or you can edit the old one as well. If you still have doubts, you can reach out Apple customer support to have your queries answered.
6. Having fun with Siri
Siri adds on to make Apple Music more beneficial. While listening to your favorite song, all you need is to say “Play more like this one”. Siri will take this command and build a tailored playlist having songs of the same mood type. The best thing about this feature is that there is no need to call out the name of the song that you are interested in listening to. You can ask Siri to either to play a song from a particular year or some television series, she will do it for you.
7. Constant improvements
During the process of signing up, you have already informed Apple Music what are your likings and dislikings as far as music is concerned. And on the basis of that information, the app has created a tailored playlist, albums and artists in the section called “For You”. It is totally up to you to keep on fine-tuning every single song that you listen to, this will help Apple Music to realize your likings and dislikings.
8. Retrieving old Beats1 playlist
If due to some reason you have missed out any show on “Beats 1”, you don’t have to panic as you can retrieve the list of all the tracks of the playlist that was played. All you need is to tap the icon of the radio and then tap banner of “Beats 1”, now you need to make a choice for one of the featured shows from the list that you can see in front of you. It’s your wish whether to choose individual songs or a full playlist, you also have the options of adding music to your library.
9. Picking your favorite ones
If on launching the music app, for the first time, you didn’t select your favorite genres and artists, then you can do it again. For that, you have to go to “For You” tab, visit the account page and you have to tap “Choose Artists for You” and you will get a second chance of doing the whole process once again. Make sure that you have tapped only once to like an artist or a genre, tap again to register your likeness. Tap and hold for a while in order to disappear the ones that you don’t care.
10. Shuffling of the songs
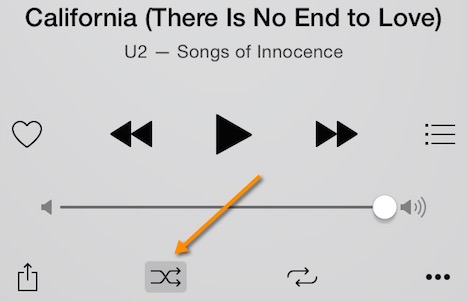
If you really like to shuffle all your songs, tap “My Music” and choose any song of your choice from the list. Open the screen of “Now Playing”, now it’s your turn to the push option of enabling shuffle. This will make the app shuffle all the songs present in the library.
11. Finding new music
It can be an arduous task to locate a new material when you have to make a choice from millions of songs. “For You” tab, it will inform as what you should be listening next by offering tailored recommendations. If you are really interested in making the list a bit particular, make sure that you have made a choice for a genre.
12. Differentiate playlist with photos
Everyone has given a new name to their playlists, it’s fair enough but on the downside, they all look the same. With this app, you have the option of customizing every soundtrack using an image, make sure that you know that it can only do when you are initiating a playlist.
13. Listening to music in noisy areas
The music app comes with a setting that facilitates you to listen to your favourite music even in the noisy areas such as airplanes.
This feature can be enabled by tapping the settings option from where you can easily choose “Late Night” option. Apple says this option will work by compressing the dynamic range of the audio and it helps in bringing down the loud sounds, reducing your efforts of fiddling with the volume button time and again.
14. Knowing more about the artist
If you want to gain more details on the album or a particular artist while listening to the radio, all you need is to long press on that particular song. This can be done by pushing the ellipses button on the side of the song and you have to tap on the top of the menu that is being displayed. This will further open up the album page, you can opt to push “Show Complete Album” in order to view all the songs from the album.
15. Getting familiar with recent searches
If you want to know what you have already searched, you need to tap the icon of the clock that is located in the search bar.
Go on and enjoy your favorite music, hope the above-discussed tips for Apple Music will prove beneficial.
Tags: apple, music, tips & tricks


