How to Create a Custom Facebook Reveal Tab, Welcome Tab or Landing Page
A reveal tab (also known as welcome tab) on Facebook is used to encourage new visitors to “Like” your page before presenting additional content such as something to download, a discount code, or a link to the exclusive content. Since Facebook made the switch from FBML to iFrames for custom Facebook page tabs, many have been left wondering how to quickly convert new visitors to fans within the new system. Fortunately, it’s not as complex as you’d think. Today we are going to show you how to create a custom tab on your Facebook page using an application called Static HTML: iframe tabs. It’s a simple tutorial that you should be able to finish within minutes.
Looking for more tips? Check out our 50 best Facebook tips and tricks!
1. Click here to install Static HTML: iframe tabs.
2. Log in to your Facebook. Scroll down the app about page and click on “Add to My Page” as shown in the screenshot below.
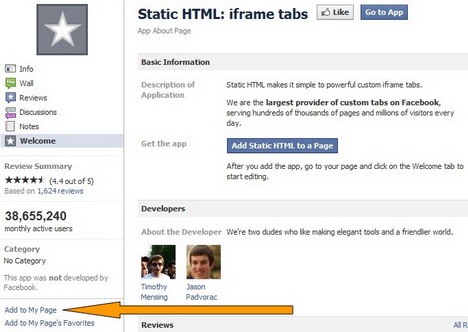
3. Select your page from the list which pops up, then click on “Add to Page” button.

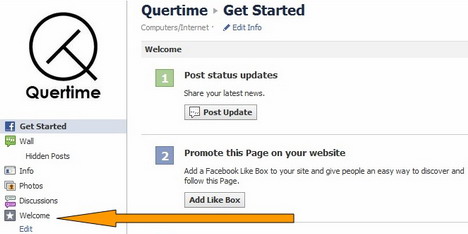
4. Now you should be able to see “Welcome” tab located at the left side of your page. Click it.
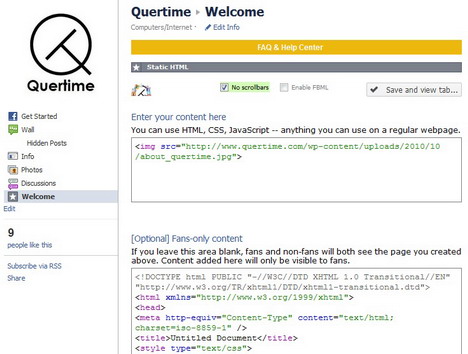
5. Enter the HTML for the content which you want all visitors to your page to see. This should be teaser content which convinces the user to click “Like” on your page. In the second box, you’ll want to enter the HTML which will display fans-only content. After that, click the “Save and view tab…” button.
Tip: You can create an image 520px wide and host it on your website or any sites that provide free image hosting services such as Tinypic.com or Photobucket.com, and then insert the image URL to the HTML code.
Below is the sample HTML code to use to embed the image into the application:
<img src=“http://www.yourwebpage.com/image.jpg”>
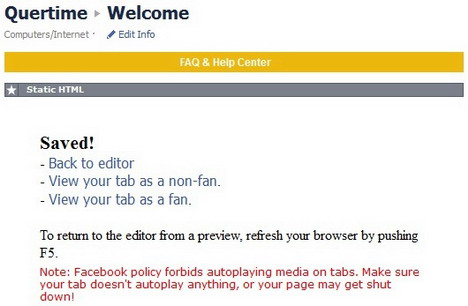
6. After the contents are saved, you can either back to editor, view your tab as a non-fan or view your tab as a fan.
7. Next, You’ll want to make sure that your new welcome tab is the first thing that visitors see when they have not yet liked your Facebook page. To do this, go to your edit page and click on the “Manage Permissions”. From the “Default Landing Tab”’s drop down list, select “Welcome”and then save the changes.
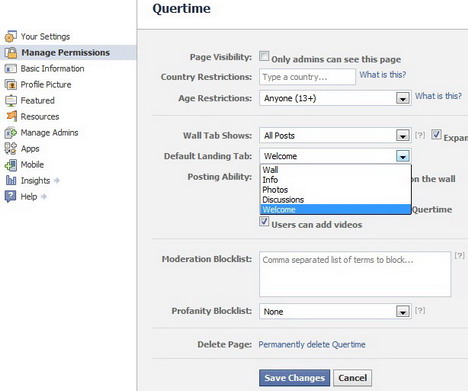
8. That’s it! You may log out your Facebook page and re-visit it as a non-fan to check if it’s working.
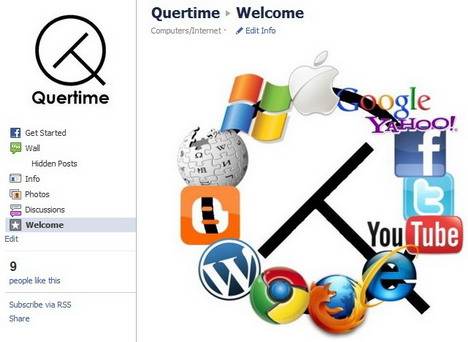
Below is our Quertime’s custom welcome tab on Facebook.
You May Also Like:
 Top 12 of Best Facebook Apps to Create Custom Tabs and Pages
 How to Create a Custom Error 404 Page for WordPress Blog
 How to Change the Background of Facebook Login Page
 How to Create a Google Custom Search Engine
 How to Create a Facebook Username URL
 20 Proven Tips to Get More Likes on Facebook Page
 Top 26 of Best Facebook Fan Page Apps that Attract Millions of Fans
 Top 46 Best Facebook Apps and Tools to Design and Customize Your Fan Page
Tags: facebook, how to, social media, tutorial
Comments are closed.


