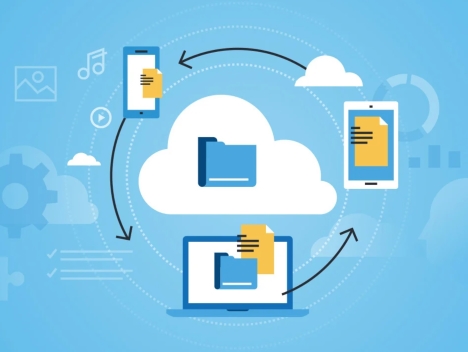
How to Share, Send & Transfer Large Files Online (9 Best Ways)
It can be difficult to send large files online, especially due to email attachments limits. But technology has changed all that and there are a lot of good ways to share, send and transfer large files. Whether you are a professional that has to send out heavy work documents, or a person that wants to share large multimedia files in high resolution, there are many choices available.

File Transfer Methods: Choosing the Right Option
The best way to transfer large files online often comes down to size, privacy/safety concerns, convenience of use and whether you want to pay for services or take the free route. Here are a few options you can count on:
- Cloud Storage Services
- File Transfer Services
- Chat Apps
- Virtual Private Network (VPN)
- File Transfer Protocol (FTP)
- File Compression Software
- Peer-to-Peer (P2P) File Sharing
- Direct Peer-to-Peer (P2P) Sharing
- Online Collaboration Tools
OPTION 1. Upload Large Files to a Cloud Storage Service
There are a number of cloud storage services you can use to upload files and share them (Google Drive, iCloud Drive, Dropbox, Microsoft OneDrive, and Dropbox.) Generally, you have to do the following:
1. Choose a Cloud Storage Service
Select a cloud storage service: There are many options available – Google Drive, Dropbox, OneDrive, are all examples of cloud storage options. Sign up for, or log in to your account.
2. Download the Cloud Service Applications
Download and install the Operating System specific desktop application or download the mobile application for use on your mobile device. These apps will offer a better upload experience and a more functional way of managing your files and folders with your chosen cloud service.
3. Prepare the File
Before uploading the file, it would be beneficial to compress it. There are number of compression tools (WinRAR, 7-Zip, and built-in compression tools operating systems which will all help with file size.) Compression is helpful to reduce upload time with a lower file size when transferring files.
4. Open the Cloud Storage Service
You can open the cloud storage service’s desktop or mobile application or visit the website through a web browser.
5. Uploading the Large File
Look for the button in your chosen cloud service that says “Upload”. Click on it and navigate to the file you wish to upload (from the storage on your computer). Depending on the file size and speed of your Internet connection the upload could take time, but watch the progress bar to let you know when it is done.
6. Use Options to Upload
Some Cloud services have specialized upload options, for example Google Drive has the option to enable “Upload via (drag and drop)”.
7. Confirm File was Uploaded
After your upload has been completed, reconfirm that the file is included in your cloud storage folder. Also, ensure that file sizes match the original file size.
8. Get the Uploaded File to Share It
- Find the uploaded file within your cloud storage service view.
- Click on the file and look for either, “Share” or “Get Link”.
- Both options will give you a shareable link, or allow you to send an invite (by entering an email address directly) to the person you wish to share your file with.
- Some cloud services will allow you to set viewing, editing, and downloading rights. You may choose to also provide a password or expiration date.
9. Send the shareable Link (or Invite Created)
- Use the generated link or each invite you sent and send to the people in the email, or copy/paste the generated link using a messaging application.
- Be sure to verify that recipients have access set equally with your permissions settings.
10. Test the Generated Shareable Link
Before you submit the generated link to share for others, you should open the generated link in an incognito window or another device to ensure they can see it as you intended!
OPTION 2: Send Large Files with a File Transfer Service

The process of sending large files through a file transfer service can be an effective method for transferring sizeable files that may be larger than email attachment limits. Here is a summary of the process for transferring large files with file transfer services:
1. Select a File Transfer Service
You will want to choose a file transfer service that you are comfortable with and delivers great service. You can select from existing well-known providers such as WeTransfer, TransferNow, SendAnywhere, SendBig, Smash or FileMail.
2. Get into the Service
Choose method / service provider and log into the website of the file transfer service that you have selected. File transfer services can be accessed via web as well as application-based services.
3. Upload the File(s)
Locate the upload option; usually represented by “upload” or “Add files”. Once you click the button, you may browse storage on your device and select the sizes file(s) that you would like to send. Other services may allow you to also drag and drop files directly to the web page interface although you would need to ensure that it is placed in the right field, not the ad, if there is one.
4. Input Recipients
You will be prompted for the recipients email address or additional contact info. Depending on the service you use; you may also be prompted for your email address so you know the file was sent.
5. Customize Settings (If Provided)
Depending on which file transfer service you use, you may have various settings to customize your file transfer. These settings could include:
- Expiration dates – You can customize and add limits to how long the file is available for download.
- Password – Password protect your file for additional security.
- Download notifications – notifications sent can inform you when the recipient has downloaded the file.
6. Send the File Confirmation
After you customize setting (if applicable), execute the file transfer by clicking “Send”, “Transfer” or “Share” depending on the service used.
7. Notify Your Recipients
Using email or other means of communication, inform your recipients that you have sent them a file and share information with them that you feel necessary, such as file name, whoever else was receiving the file and/or password information if you selected to add security to the download.
8. Confirm Receipt
Depending on the file transfer service, there may be a confirmation regarding.transfer completion on your file transfer completion. Depending on the service you chose, you may get notification saying that the file was sent or something similar in an email.
OPTION 3: Transfer Large Files with a Chat App, Like Telegram Messenger
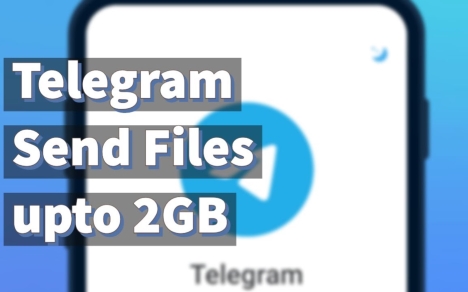
Sending large files over Telegram is quite straightforward according to its large file size cap. Would you like to know how you can do it?
1. Send the File Directly
- Open a chat with the person or group you want to send the file to.
- Click on the paperclip attachment icon.
- Select File or Document.
- Search your device for the large file you want to send.
- Telegram allows a file size to a certain maximum (currently 2GB per file).
2. Use a Cloud Service
- Upload the large file to a cloud storage service (a good example: Google Drive, Dropbox, OneDrive).
- Generate a link to the file that can be shared with others in that cloud service.
- Copy the link, and paste it into a telegram chat. Telegram will generate a preview of the file, and the receiver can click to access the file.
3. Compress the File
- If the file exceeds Telegram’s file limit, consider using file compression software/tools on your device to compress the file.
- Send the compressed file in telegram.
4. Use a Bot
There are a few bots on Telegram that are intended to help in transferring large files. An example: @FileConverterBot or @bigfilebot. Using these various bots, you upload the large file and generate a link to share with your contacts.
5. Split Large Files
- If the large file exceeds the allowed maximum size, consider using file-splitting software or apps to split it into smaller parts.
- Send the separate files, and ensure the receiver knows how to reunite the smaller files after receiving them all.
Telegram provides flexibility to transmit larger files and materials alike. Always be aware of how the receiver feels and know if they are comfortable receiving large files.
OPTION 4: Transfer Large Files via a VPN

A VPN (Virtual Private Network) doesn’t change the way you transfer a file, rather it secures and encrypts your connection and data while transferring data between 2 devices or devices on 2 networks (with either Direct Internet Access (DIA) connecting to each device directly and/or establishing a site-to-site VPN connection between the networks connecting both devices). The following is how you can transfer a large file using a VPN:
VPN Set-up
1. Make sure that both devices or networks are on the VPN and properly set-up with the administrative setup configured on both devices or networks.
2. Use a VPN service that guarantees reliable access and uses strong encryption standards provided by protocols that help protect your data as it transfers.
File Transfer Methods
Use the following file transfer methods, which are compatible with establishing and maintaining the VPN connection.
1. Cloud Storage: Upload the large file to a cloud service (e.g., Google Drive, Dropbox, or OneDrive) and share the link securely via an encrypted VPN connection.
2. Direct Transfer: If both devices are connected to the same VPN network, both devices can use file sharing protocols that allow the transfer (Just like completing a direct transfer without VPN, both devices can either obtain the necessary IP address and join successfully using the computer’s local area network (LAN) with either SMB (Server Message Block) or FTP (File Transfer Protocol)).
3. Email / Messaging Apps: Use an encrypted application of the email service, or a secure and encrypted application of the messaging service over the secured VPN connection to send the target intended file.
Encryption & Security
1. The file transfer method chosen must use encryption to safeguard your data. Most file transfer protocols (FTP/SMB) will encrypt your data while in transit; most cloud storage services encrypt data while in transit.
2. If both devices are using file-sharing protocols, make sure they are expressly configured in a secure manner with file sharing using encryption and restricting unauthorized access into secured devices.
Consider VPN Speed & Limitations
1. Transferring a large file may take some time, especially while using a VPN because of the requirements of encryption, as well as possible limitations in bandwidth.
2. Be aware of potential limits your VPN provider may impose on file transfers (e.g., limits on size allotted for download as well as limits on bandwidth allowed to download).
VPN Tunnel Stability
1. Ensure that you maintain a stable connection to ensure you not be interrupted by sudden disconnection to the VPN service that can lead to corruption of the file being transferred, or an interruption that would not allow the file to transfer in whole (due to renegotiation would start from the beginning of the transfer).
2. It is the user’s responsibility to check the VPN service provider and read their terms and conditions for understanding (if there are) limits about the file transfer in the first place.
Lastly, remember that while a VPN will keep your data secure and private (internet), based on the VPN service you obtain, speed and performance will vary based on network conditions and companies file transfer methods. When you use a VPN services orientated towards security and privacy, where applicable, prioritize file transfer methods that are secured and encrypted that protect from your device or network to the receiving device, especially if that file is sensitive or confidential.
OPTION 5: Transfer Large Files via FTP, Using FileZilla
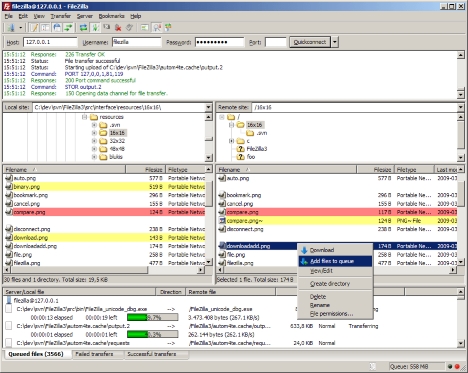
Transferring large files via FTP (File Transfer Protocol) in FileZilla is a simple process. Follow these basic steps:
Setup
1. Install FileZilla
Download and install FileZilla from https://filezilla-project.org/.
2. Open FileZilla
Open the Filezilla application on your computer.
3. Connect to the FTP Server
- Select “File” -> “Site Manager” from the menu.
- Select “New Site”.
4. Enter Your FTP Server Information
- Host: address of your ftp server (ftp.yourdomain.com)
- Port: use port 21, if unsure just just leave it blank.
- Protocol: FTP – File Transfer Protocol
- Encryption: if available choose the type of encryption.
- Logon Type: select “Normal”.
- User and Password: type in the username and password (the ftp login credentials).
- Click connect.
Transferring Files
1. Find the Local File
On the left side of FileZilla (the “Local Site” panel) find the file, or folder you want to upload.
2. Find the Remote Directory
On the right side of FileZilla (the “Remote Site” panel) navigate to the directory to upload your upload file.
3. Upload the File
Drag and drop the file from the “Local Site” panel to your location in the “Remote Site” panel.
Or, right-click on file -> Upload.
4. Monitor Upload Progress
FileZilla will automatically begin uploading the file, and you can monitor this on the “Queued Files” and the “Successful Transfer” tabs in the bottom of the window.
5. Wait for the File to Upload
Be aware that transferring large files may take some time to upload. Ensure you have a good internet connection, and do not interrupt the process.
6. Verify Transfer
When finished uploading, you can also verify the file uploaded correctly by checking the file on the remote server.
7. Disconnecting from FTP Server
To disconnect from your FTP server simply click the “X” on the FileZilla application or, select “Server” -> “Disconnect” from the menu.
It’s important to note that while FTP is a common method of transferring files, it is not a secure method of transferring files. If you’re worried about such as security using FTPS, or SFTP will provide for scenario, they both encrypt the file when transferred.
OPTION 6: Transfer Large Files with a File Compression Software
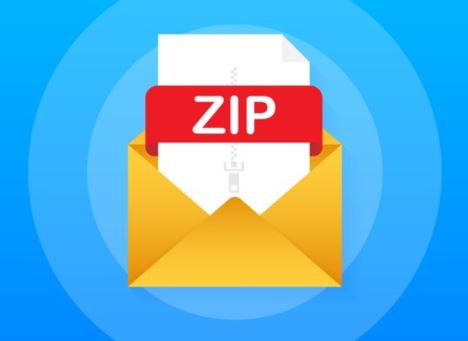
Using file compression software is a very effective way to send large files, and here is a basic outline of how to do it:
1. Choose a Compression Software
You can choose any of the available compression tools you want to use, including WinRAR, 7-Zip, WinZip, or macOS built-in Archive Utility.
2. Install the Software
If you do not have it already, download and install the compression software of your choice.
3. Compress the Large File(s)
- Open the compression software.
- Locate the file or folder to be compressed.
- Right-click on the file/folder, and choose the compression selection option (for example, you would click the “Add to archive” option in WinRAR, or the “Add to [filename].zip” option in 7-Zip.
4. Select Compression Settings
You will typically have some options available for compressing your file(s). Typically the more you set the level of compression the smaller the file will be, but the longer it will take to compress.
5. Create the Archive
Confirm the compression action. The compression software you used will then create an archive file (i.e. .zip, .rar, .7z, etc.) that contains the large file(s).
6. Transfer the Compressed File
Great, now you are ready to send the compressed file! Here are some ways you can send your smaller archive file:
- Email – Attach the compressed file to an email, and then send it if your file is within the email’s attachment limits.
- Cloud Storage – Upload your compressed file to a cloud storage software platform such as Google Drive, Dropbox, OneDrive, and share the link.
- File Transfer Services – Utilize a file transfer tool like WeTransfer, Filemail, and others to send your compressed file.
7. The Recipient Downloads/Extracts
- The recipient would then need to download the compressed file and they will need to use the same (or compatible) compression software to extract its contents.
- Right-click on the downloaded file and select the extract or decompress option.
To Keep in Mind: Compressing files will reduce the file size, but the amount of file size that is reduced varies based on the file type. Many popular and widely used file types are typically compressed already and have very diminished results from further compressing them (including .MP3 or .JPG files), and you should also ensure the receiver of your archived file has the compatible software to be able to extract the type of file format your compressed file has.
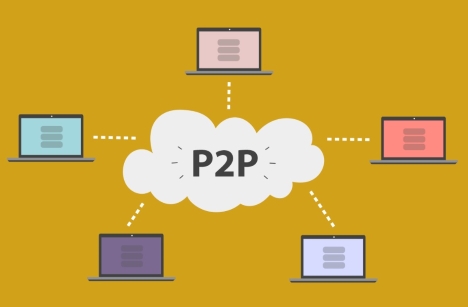
OPTION 7: Transfer Large Files via Peer-to-Peer (P2P) File Sharing

Transferring your large files via Peer-to-Peer (P2P) file sharing is as easy as simply having a software/platform to share directly between devices. Here is a general idea of how to transfer a large file via peer-to-peer file sharing.
1. Select a P2P File Sharing Software
P2P Software: You have your choice of many types like BitTorrent, eMule, Shareaza, or FrostWire, so select one according to your taste and platform.
2. Prepare to Transfer a File
Download & Install: once you’ve selected a P2P software, you will need to install it on your device.
Adequate Space & Stability: make sure both sender and receiver device users have adequate space, and a stable internet connection when transferring files using P2P.
3. To Share the File
- Create Torrent/File: If you are using BitTorrent for example, you need to create a .torrent file of the .large file you would like to share.
- Upload Torrent/File: you will need to upload the .torrent file or the file for a P2P network or platform to make the file available for download.
4. To Download the File
- Find & Download File: use the torrent file just created, or utilize the search feature of the software to find the file you need.
- Start Downloading: begin downloading the file; ensure you choose a download location that has enough space to accommodate the new file.
It goes without saying, but I will anyway, you should always use P2P file sharing responsibly and ensure the files that you are sharing are compliant with applicable law.
OPTION 8: Transfer Large Files via Direct Peer-to-Peer (P2P) File Sharing
Direct Peer-to-Peer (P2P) file sharing allows you to transfer files directly between two devices, without utilizing an intermediary server or service to facilitate the exchange of data. The following is how to share files directly between two devices:
Ways to Directly Peer-to-Peer File Share
1. Wi-Fi Direct (Android) or AirDrop (iOs/Mac)
Android (Wi-Fi Direct):
Go to settings > Wi-Fi & Internet > Wi-Fi Direct, then tap on the device you want to send files to and follow the protocols to send it.
iOs/Mac (AirDrop):
If you would like to share files between two iOs devices, first go to the Control Center and tap on AirDrop to enable the file sharing. Select the files you want to share, tap Share and select a designated contact to share the files with. In order to Air Drop a file or files between to Mac Devices use finder to locate the file on one device and AirDrop it to another Mac or an iOs device with AirDrop enabled.
2. Bluetooth File Transfer
- Have Bluetooth enabled on both devices.
- Pair the devices if they haven’t been previously paired.
- You’re prompted with the Bluetooth settings to send files from one device to another.
3. NFC (Near Field Communication)
- For devices that are NFC enabled, you will have to enable NFC within the menu settings.
- You will then tap the two devices together in order to send files between the two processes.
General Steps for Direct P2P File Sharing
1. Prepare the Devices
Make sure that both devices are connected to the necessary connections (Wifi, Bluetooth, NFC).
Make sure both devices are being discoverable (or visible) to each other.
2. Select the File(s) to Transfer
Find the file(s) you want to share on the sending device.
3. Initiate the Transfer
- Depending on the depending method (Wi-Fi Direct, AirDrop, Bluetooth, NFC), follow the unique steps to initiate the transfer.
- On the sending device, choose the recipient device, select the file(s), and start the share.
4. Accept the Transfer
On the receiving device, accept the incoming file transfer request, or prompt.
5. Wait for Transfer to Complete
Wait for the transfer to complete. Depending on the file size and connection, this could take a little time.
6. Confirm Files Have Transferred
After the transfer is complete, confirm that the file was received on the receiving device successfully.
In all cases, be wary of the files you choose to accept from unknown senders, as this could be a source of security vulnerability.
OPTION 9: Transfer Large Files with a Collaboration Tool

Collaborative technology is built with file-sharing abilities, and sharing a large file can usually be accomplished in a couple of ways. Here’s a general approach that will work on most collaborative platforms:
1. File Sharing Built into the Platform
- Upload directly: most collaborative applications (Slack, Microsoft Teams, Asana, etc.) give you the option to upload a file directly into a conversation or into the project/team area.
- Drag and drop: most scrolling conversations and file project areas will let you drag the file from your computer and drop it into the conversation window or the file-sharing area.
2. Send a Link from Where You Uploaded the File Using Cloud Storage
- Upload it to cloud storage: use Google Drive, Dropbox, OneDrive, or Box to upload the large file.
- Create a link: create a shareable link of the uploaded file.
- Send the link in the collaborative technology platform: paste the copied link in the conversation of your collaborative technology platform.
3. Use Apps or Services That Can be Integrated into the Collaborative Tool
You’ll also find there will be a range of file-sharing apps that can integrate with collaborative tools. For example, Slack offers Google Drive and Dropbox, etc. The integrations can usually make transferring files easy.
4. Are There Size Limits?
Some collaborative tools will limit the file size you can upload, so please review and be sure your file size can be uploaded to the collaborative technology you are using.
5. Access and Security
- Always check that the intended recipient has access to the shared files and that you modify the permissions as deemed important if sharing sensitive data.
- Be mindful of any security settings that the collaborative technology (or file-sharing service) can provide when sharing your files.
6. Notifications and Follow-up
Notify your team that you have shared a file with them and follow-up, if need be, either in person or digitally to confirm it was received and downloaded.
The final method you decide is best for file transfer will often depend on the features of the collaborative tool you are using, combined with the preferences you and your team have in relation to communicating. However, always consider your security and potentially privacy needs, access by everyone that needs to see/have the material, and find the easiest method doable for everyone in the collaboration platform (eg. using an integrated storage area may be a great method for all people in your team to just have to click one link without having to potentially click other links).
Conclusion
Distributing and transferring large files via the internet can be a headache, but not anymore because there are so many options available. Depending on your file type, how it will be transferred, and what level of security you will need, you can have a near seamless transferring experience. Today with cloud storage and compression, or file transfer services, you can have many more options for your files. Individuals and businesses have increased capabilities in terms of sharing large files in an easy and secure manner.
You May Also Like:
 20 Best Tools to Send and Share Large Files Online
 How to Share File / Attachment between Gmail and Google Drive
 20 Extremely Easy to Use Online File Sharing Tools and Websites
 26 Best Free File Sharing Sites and Services for Large File Size
 Download Free FTP Client to Transfer Files between Computer and Web Host
 Best Free Online Storage Services and Data Backup Solutions
 20 Useful Tips on Managing PDF Files with Much Expertise
 Free Online Storage Service and Backup Solution – Amazon Cloud Drive
Tags: file transfer, how to, tutorial, web app